Teaching
2021 Advanced Design of Interactive Systems
Wendy Mackay, DR Inria
Advanced Design of Interactive Systems builds upon the Introductory course, with the emphasis on understanding how to select design methods and how to create principled, customized design activities within a participatory design process.
About
The Intro DOIT course is a prerequisite for the Advanced DOIT course. The former values speed and effective collaboration, while providing a quick overview of a complete set of interaction design methods. The latter builds upon the techniques in the introductory course, but emphasizes participatory design to actively involve users throughout the design process.
Grading is based on your ability to identify key design problems from the user's perspective and your creativity in generating a solution inspired by design principles, especially co-adaptation and instrumental interaction.
The class will be divided into groups of three or four. You will be asked to create a novel interactive system that is designed to support an activity for your peers, for example, finding local sports facilities, transportation options, housing possibilities, or shopping options.
As in the Intro DOIT course, you will be asked to find out as much as you can about the problems users currently face, and then design and video prototype an original solution that addresses their needs. You will also run a participatory design workshop with users and revise it based on the results of a generative walkthrough.
Each group will present their final project on Wednesday, 17 February. Given the pandemic, the course is likely to be presented via video.
Schedule
Course Schedule
T3 (trimester 3) on Wednesday mornings, from 9:30 - 12:30.
06 Jan Introduction and Review
13 Jan Design
20 Jan Design
27 Jan Participatory Design Workshops
03 Feb Redesign and Video prototyping
10 Feb Generative Walkthrough
17 Feb Final presentations
Howto
Useful tools for the Advanced Design course
To attend remotely, join the room below:
https://eu.bbcollab.com/guest/9a9a0b0be601432a8bf1d5af89a51404
Every class will always use this link.
... use this website?
You should have received your account by email, if not please check your spam or ask us.
The content in this website is fully editable by everyone with an account, so please be careful and respect other student's work!
Participants tab: Please add your photo to your profile. Do not worry if the page says you are not allowed to save –– it does work.
Assignment tab : Download the worksheets for the assignments. (Be sure to double check that your username appears at the end of your filename -- it should have been added automatically on download).
Group tab: Create a page for your group, as a child page using the ADVANCED GROUP REPORT template, make it VISIBLE, then pick your techniques fill the fields in your group's page.
Check here for info about the assignments: For slightly more information about each assignment.
If you see an error on login, reload and it should work. Also, try again if it says you are not allowed to save. Sorry for these bugs -- we've been working all summer to try to get ready for the covid version of the course, and although it mostly works, we are still ironing out the details.
Contact us if you need help: Nicolas (nicolas.taffin@inria.fr) is the web master,
Alex (alexandre.battutaz@gmail.com) is the Collaborative Video Clipper master,
Evan (han.han@lri.fr) is the TA, and Wendy (mackay@lri.fr) is the professor.
If you are at home and have your own iPad
You can run Videoclipper Beta through this test link :
https://testflight.apple.com/join/3PrPezCG
Current build is 1.2.27, please update from Testflight app if you have a previous version installed.
Warning : HCI VideoClipper does not support iphone nor night mode (dark interface) now.
Once in videoClipper app
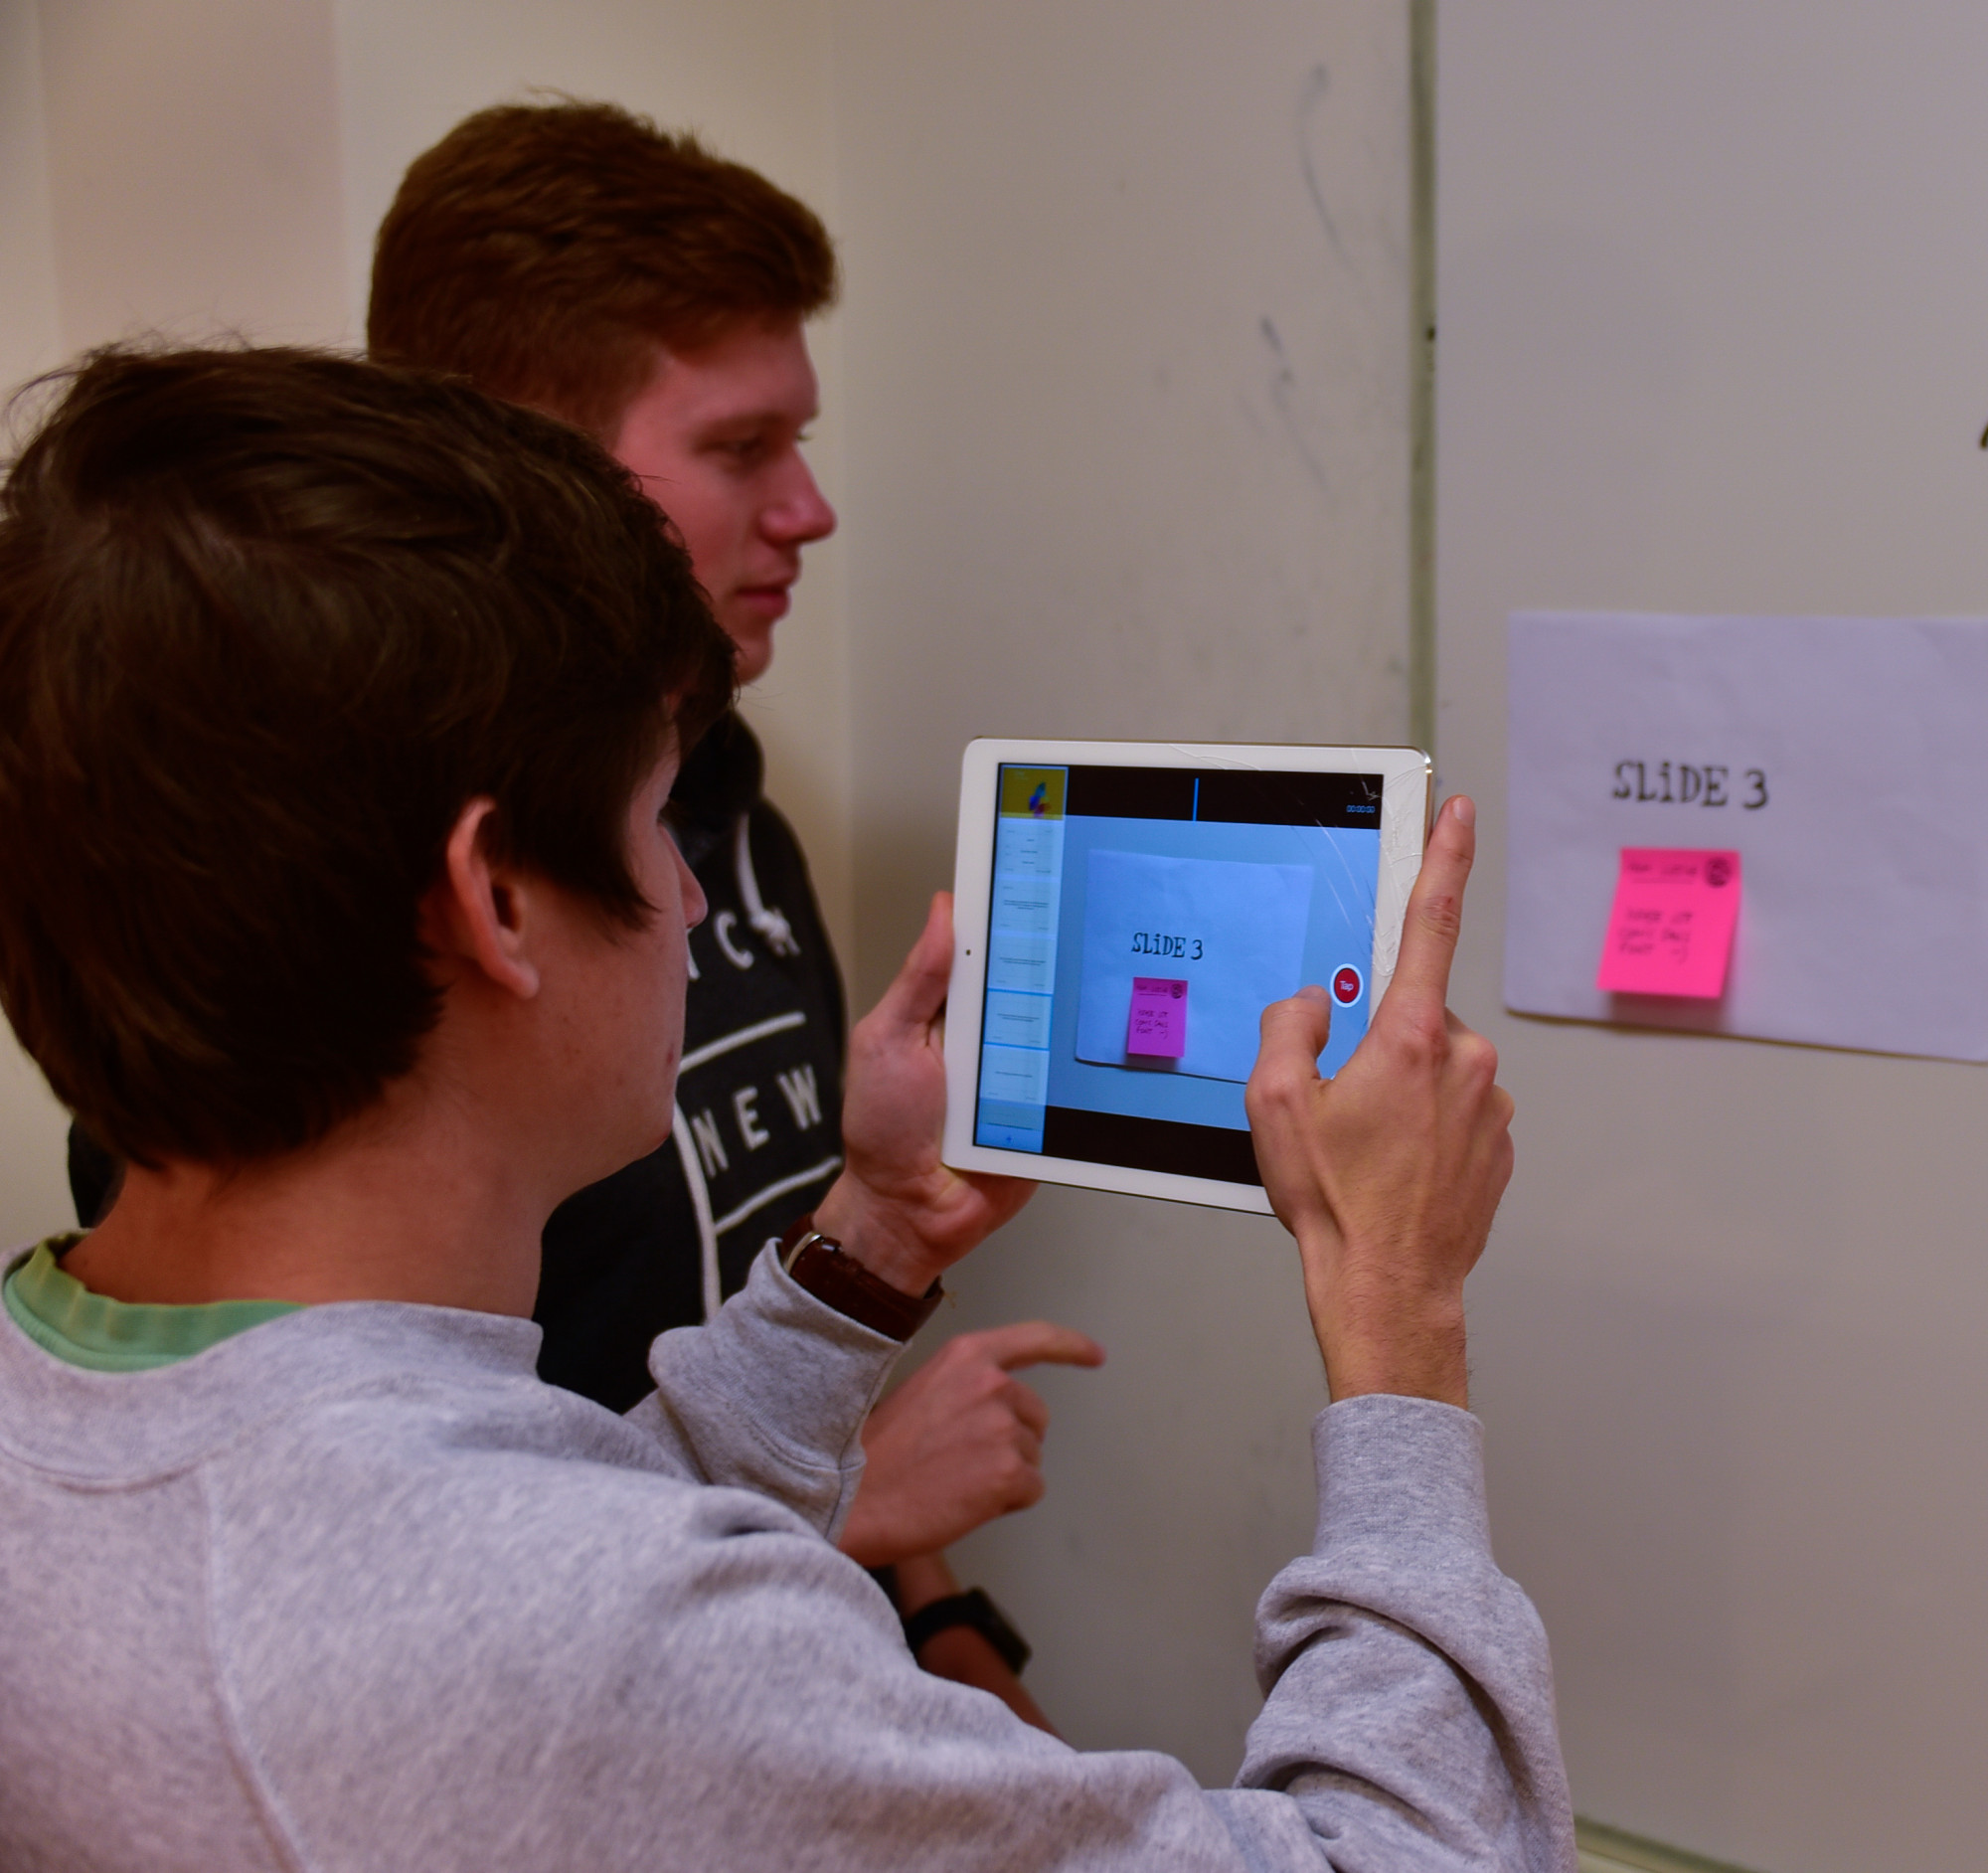
Videoclipper helps you build a quick video with NO POST PRODUCTION.
You'll be able to create a project, add story lines, shots title cards and instruction cards.
Don't build tool long lines, you rather cut your story in several lines. Each one with a title card
From your iPad project, you can also export a line to the online storyboard:
The fastest way to do so is first to open the online (web) storyboard on your computer (the personalized link is in your group report)
then trigger the qrcode at the bottom of screen.
You can then export a line from the iPad : swipe left on the line, then aim the qrcode, choose a line name to insert before, and confirm.
At the top of the project view you can also export a movie file that you may upload in your group report.
But you'll probably use the online version for that, gathering all your group lines and exporting a video file to upload in your report.
If you don't own an iPad
No problem : you can connect to your group's online interactive storyboard with a computer, phone or tablet. Check instructions below.
The link is already stored in your group report.
... use Collaborative Video Clipper Online?
Collaborative clipper is a web based tool that mimics video clipper's features and that is a collaborative support for video brainstorming or storyboarding. This tool works on both mobile devices and computers.
For the video prototype exercises, you will already have a collaborative workspace created, that you can access via your group page.
Collaborative Storyboard features :
- To edit the collaborative storyboard, you need to drag and drop the needed tools on the storyboard.
- With the "add video" tool, you can take a video from your mobile phone's camera, or upload one from your device's file system. It can take some time to upload depending on the latency. Be patient ! :)
- You also have access to a QRcode on the bottom of the page. This can be used to easily share with other users, import a line from video clipper or export the storyboard to video clipper.
- Keep in mind that you can upload parts of a video clipper storyboard (storylines) into a collaborative one !
Be careful We noticed a few bugs that we can’t fix right now. Here are a few tips to avoid it :
When you upload a clip from your phone or your computer directly on the collaborative storyboard, please check that the browser can read the video.
If it does not, if you named your video yourself, please name it with letters and numbers ONLY (no special characters like “+” or multiple extensions like “video.mp4.mp4”).
If the issue persists, please try to shoot the video from another device, or ask one of your groupmate to shoot it for you.
Previewing and Downloading the final video from the Collaborative Storyboard :
- On the bottom of the screen, you can find an "open view" button. It leads you to a new interface in which you can preview your whole video on both mobile devices and computers (make sure to push the “start player” button to open the video player, and the “update video” button to update the video with latest changes).
- On computers only, you have an additional feature allowing you to generate a link to download the whole result (create link button). The latest created link will be on the top of the "Video Link List".
Be careful Don’t close the tab if you are rendering a new video.
If encountering any issues, please send me a mail to battut@lri.fr, i will make sure to answer asap.
... set up a design session?
Gather the following materials:
- Paper, colored paper, postits, transparent sheets
- Felt-tip pens, scissors, cutter
- Tape, glue
- (optional) play-dough or other moldable materials for physical prototyping
Technical recommendations:
- Prepare a quiet, decluttered workspace / desk / table with good lighting
- If possible, find someone to help (videographer, maker, etc.)
- Connect to both adresses (video call and CollaborativeClipper) with a laptop -- a wired network is better than wifi.
- Use a mobile device (phone, tablet) connected to CollaborativeClipper.
- Try to avoid having simultaneous network connections at the same time: no software updates, no binge watching by your roommates.
- If you don't have a tripod, you'll need a support. (You can create a smartphone support with a simple, toilet paper tube -> how to in this video (at 1') but you'll also need to shoot more vertically on the table.

- You can check the website http://prototips.lri.fr to get inspiration / to illustrate how users will interact with a new system. This website will provide you with all needed tips and tricks for rapid prototyping. Paper & pencil will be all you need to mock-up your novel technology, making video prototyping quick, easy and inexpensive while providing high value to your design team, users and stakeholders.
How to… edit your poster ?

Your poster summarizes the key elements of the design process (one per team).
You can find a poster template in the assigments section.
Please prepare synthetic texts (short versions) to communicate your work, Postits, drawings, etc.
Then use an image editor (Photoshop, The Gimp…) to paste diverse elements on this template : your texts, postits, images from your storyboards, or sketchbook.
It really can be hand drawn and hand written, as long as it is legible and written with a bold felt-tip pen.
For your information, Intended final size is very large (A1 size is equivalent to the surface of 8 A4 pages !).